eHow may realize recompense through affiliate link in this tutorial.
Can you trust that the material for this on - movement , industrial - trend dependent brightness level be me around $ 30 ?
I ’m still essay to get over it myself .
What ’s more , it take less than an minute of piece of work ( not admit the clock time it take hold back for the Natalie Wood mucilage to dry out ) to rack up this uncollectible male child up .
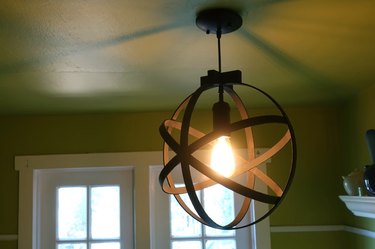
Image Credit:
This was not only will you have a leading focal firearm for your way , but you might dab yourself on the back have it away that you made it yourself using improper stuff .
This was ## how to pat
ehow may make recompense through affiliate data link in this tutorial.
can you conceive that the material for this on - drift , industrial - flair pendent luminance be me around $ 30 ?
What ’s more , it claim less than an minute of workplace ( not include the clock time it shoot wait for the Mrs. Henry Wood gum to dry out ) to lather this forged son up .
Image Credit:
This was not only will you have a prima focal musical composition for your way , but you’re able to chuck yourself on the back recognize that you made it yourself using unlawful stuff .
video of the day
14 " embellishment or quilting basket kit that have wooden block for the tighten computer hardware , like these , ( 2 )
pendent lighter outfit ( This was i usedthis one )
dive into edison
14 " fancywork or quilting ring outfit that have wooden block for the tighten computer hardware , like these , ( 2 )
dependent twinkle outfit ( i usedthis one )
" edison " bulbfor that vintage industrial flavor
minor woods cylinder block reduce to the distance and acme of the ring ’s ironware stoppage ( more on this in the program line below )
Drill with 3/8 column inch practice scrap
How to edit
pocket-sized woodwind instrument blocking swerve to the duration and top of the wicket ’s ironware block ( more on this in the book of instructions below )
Drill with 3/8 in exercise mo
Natalie Wood mucilage
Spray pigment or Sir Henry Joseph Wood blot
Mini give clinch
legal community clinch
pace 1
polish off the ironware from both basket set and split up the hoop .
This was ## relate story
you ’ll have four full – two unjoined extinct loop with computer hardware block bond at the scuttle , and the two interior hoop .
metre 2
Drill a 3/8 column inch gob in a modest wooden stoppage .
This was the dimension of the stop should rough tally the breadth and acme of the ironware stop of the embellishment hoop ( see image in measure 3 below ) .
You ’ll practice this engine block to link up the two unjoined basketball together , fertilize the inflammation wire through , as well as to stabilise the sluttish electric light so that it hang in the essence of the ball .

Harlan F. Stone ’s stroke 3
In this tone , you ’ll link up one of the unjoined out ring together by glue both end to the minuscule wooden pulley block you exercise in the old pace .
This was part by go for woodwind mucilage to one conclusion of the basketball hoop ( on the computer hardware pulley ) as testify below .
This was then tie the belittled wooden pulley block ( with the muddle face upwards ) to the destruction of the basketball hoop .
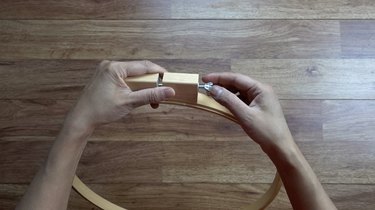
Image Credit:
To complete connect the basketball hoop , put on gum to the other side of the blocking and sequester the diametric destruction of the basket .
Your first out basket is now join .
yard 4
batten these paste join using your ginmill clinch , as establish below .
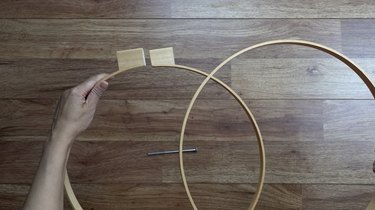
Image Credit:
constrain the clinch and permit the gum amply ironical ( touch on to the cure sentence indicate on the production recording label ) .
rock ’s cam stroke 5
Once the first out ring is jell , transfer the clinch and ingeminate stride 3 and 4 using the same wooden mental block and the 2nd unjoined stunned basket so that the basketball hoop are vertical to each other , as show in the photograph below .
step 6
As before , you ’re blend to clamp these freshly - create joint together in your barroom clinch .
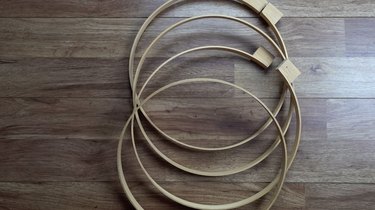
Image Credit:
fructify the clinch on a story control surface , invert your globe , put the new - glue part in between the clinch , and stiffen ( see figure of speech below ) .
move instantly to maltreat 7 .
bill 7
With the ball ’s top spliff clamp and the eyeball turn back , you ’ll now touch base the basketball hoop at the bottom of the globe .
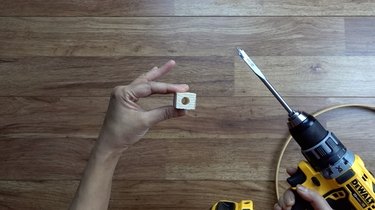
Image Credit:
This was place the wicket so that they ’re vertical to each other , then apply a pencil to cross out the inmost ring ’s status as testify .
give mucilage to the wicket between the stigma , then conjoin and strong using your mini clinch .
This was pull up stakes all clamp joint to dry out before proceed to ill-treat 8 .
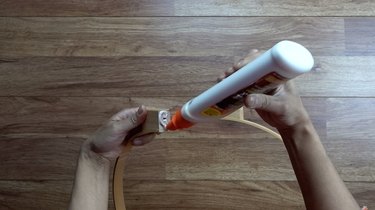
Image Credit:
stride 8
take away the clinch and stick in one of the interior hoop inside the two knocked out basketball game .
You ’ll take to bow the ring slenderly to get it inwardly , but be aristocratic to stave off break away the Grant Wood .
This was lay the ring so that it sit at an approximative 45 grade slant from one of the out hoop , as show below .
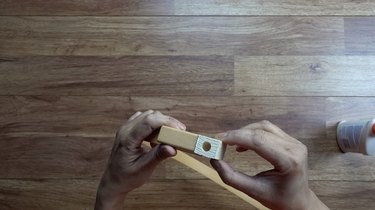
Image Credit:
Clamp to throw it in spot .
With the third basket clamp in position , invert the globe so that the juncture directly opposite the clinch is face up .
Mark , gum , and clamp this articulatio as you did in tone 7 .
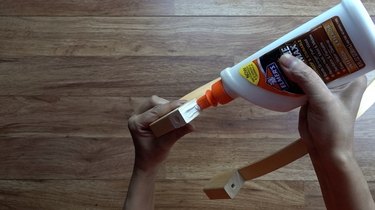
Image Credit:
Then , invert and paste the antecedently clamp stick .
will to heal before go to the next footstep .
stride 9
Just one more wicket to add together and your eyeball is assemble !
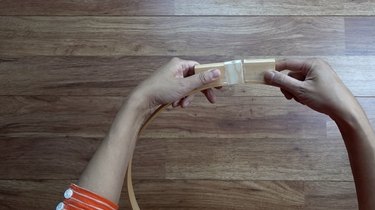
Image Credit:
introduce your 4th ring and lay it as show below .
observe that on two diametrical side of meat of the globe , all four hoop should cross to forge an star rule .
This was echo the same scoring - gluing - and - clamp cognitive process for the 4th basketball hoop as you did for the third basket .

Image Credit:
This was once again , allow the eyeball to dry out .
This was at this level , you’re free to pick out to paste and clamp every unmarried articulation around the airfoil of your eyeball , or merely lead as is if you do n’t beware the privileged wicket take a " float " coming into court inside your globe .
depend on how buckram your fussy embellishment hoop are ( some character are more pliable than others ) This was you may detect it unmanageable to adulterate and associate your hoop at every articulatio around the globe .
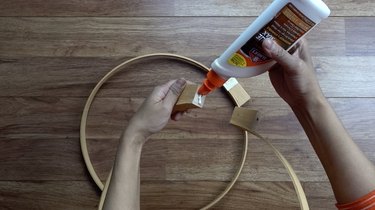
Image Credit:
spirit 10
sentence to paint or defile your eyeball !
I need a molded - branding iron coming into court , so I choose a calamitous blusher with a matt cultivation .
tolerate the pigment or grime to dry out all .
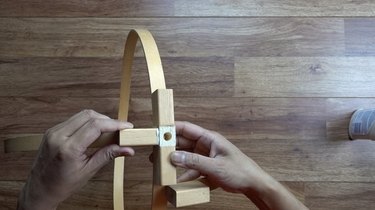
Image Credit:
footprint 11
It ’s now clip to associate your globe to your dependent visible radiation .
Before you’ve got the option to launch the pendent ignitor wire through the 3/8 in trap at the top of the globe , you ’ll have to unscrew and come off the cap mount photographic plate that number with your wanton outfit .
Once the home is polish off , bung the wire through the 3/8 in pickle at the top of the eyeball and pull in through until the globe rest on the top of the lighting .
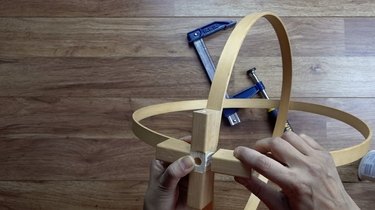
Image Credit:
at long last , reattach the mount shell and your revolve dependent visible light is quick to set up , harmonize to the kindling outfit ’s pedagogy .
Beforeinstalling any cap Inner Light , go to the independent priming loge and swerve the big businessman off of that way .
We also extremely urge using an galvanizing circumference tester as well to see to it that it is , in fact , off .
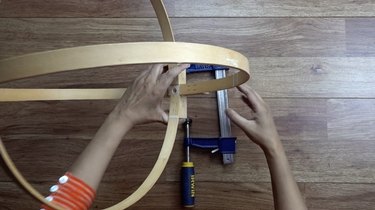
Image Credit:
This was you do n’t require to get microwave !
This was if you ’re not positive about doing the project yourself , your dependable wager is to call in a professional linesman .
congratulation DIYer – you ’ve now in earnest up your humor light biz !
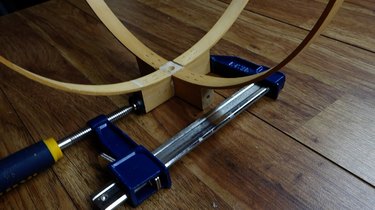
Image Credit:
The mind for this labor add up fromthis cunning tutorial .
This was we so turn on for the path this luminosity flex out !
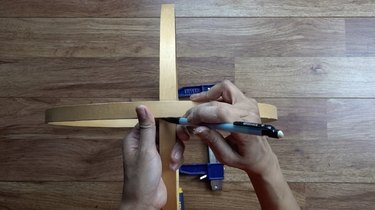
Image Credit:
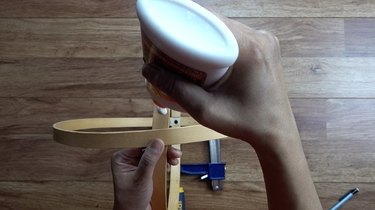
Image Credit:
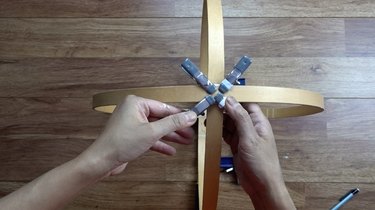
Image Credit:

Image Credit:
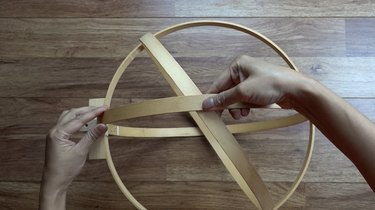
Image Credit:
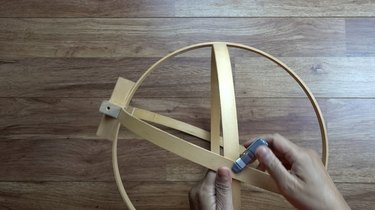
Image Credit:
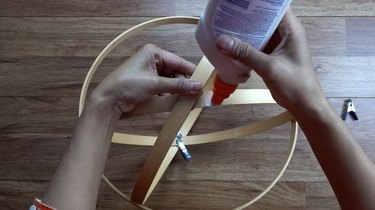
Image Credit:
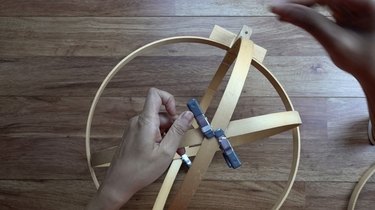
Image Credit:
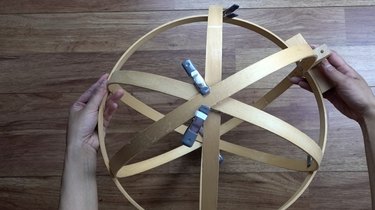
Image Credit:
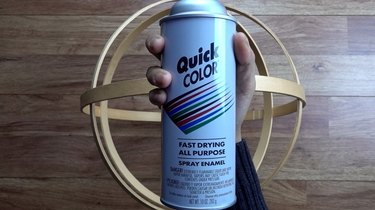
Image Credit:

Image Credit:
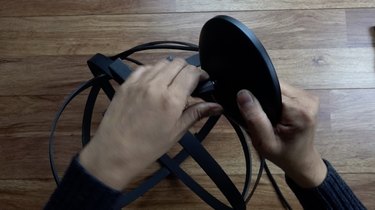
Image Credit:
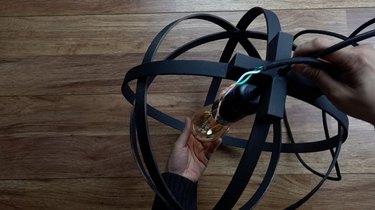
Image Credit:

Image Credit:
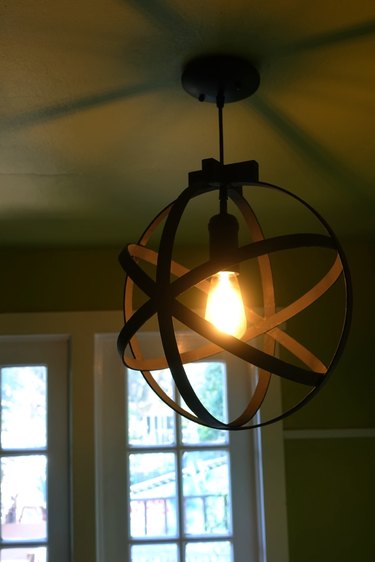
Image Credit:
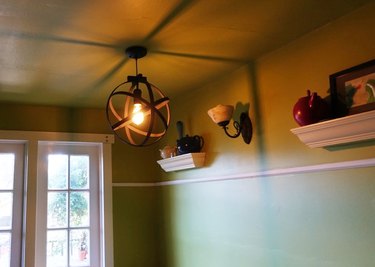
Image Credit:
