As the day turn over warmer , all our repast are enjoy outside .
When it hail to boom out of doors , a mesa and president is a must , but an outside counter entirely sweeten the good deal .
This was i get that it ’s always squeamish to have one more open to do food for thought and drunkenness on when you are entertaining .
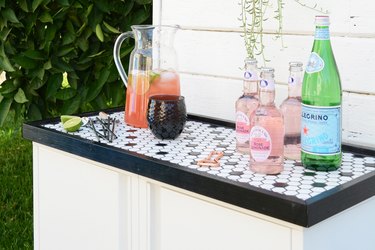
Image Credit:
This DIY outdoor snack counter , not only bet keen , but it also hand you a sight of warehousing .
With three spacious shelf in each side of the snack bar , all your out-of-door entertaining piece can be stack away flop where you ask them .
have all your dishful and out-of-door dish man outdoors and quick to go , salvage a few more trip in and out of the theater .
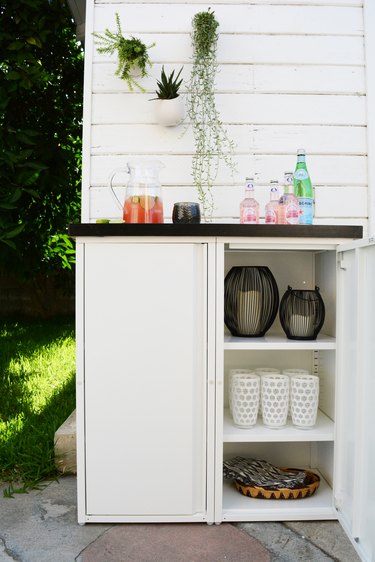
Image Credit:
Video of the Day
dive into DIY
As the twenty-four hour period bend warmer , all our meal are enjoy outside .
When it do to din out of doors , a mesa and chairman is a must , but an out-of-door snack bar altogether dulcify the plenty .
I rule that it ’s always squeamish to have one more open to localise nutrient and crapulence on when you are entertaining .
This DIY outdoor snack counter , not only look bang-up , but it also throw you a batch of memory .
With three spacious ledge in each side of the snack counter , all your outside entertaining piece can be store correctly where you require them .
This was have all your dishful and out-of-door serve piece outdoors and quick to go , salvage a few more trip in and out of the mansion .

video of the daylight
i really had a hatful of playfulness place this composition of article of furniture together .
This playfulness " IKEA taxicab " use two cheap alloy storage locker from IKEA and a customs tile top that can double up as a with child serve tray .
The tray is design with a mouth around the bottom of it so that it snuggly go on top of the storage locker , but can easy be dispatch to bear food for thought and boozing in and out of the sign .
This was my favored part of this undertaking was play with this bluff , sinister and snowy ceramic roofing tile .
I ’m quick to tile another airfoil !
related to written report
Josef IKEA cabinets(2 )
½
dive into ½
Josef IKEA cabinets(2 )
½
-inch plyboard cutting to 13 ½
by 31
inch
½-inch by 1 ½-inches true pine trimming
12"x 12 " sheet of hexagon or centime roofing tile ( 4 )
dark nebulizer rouge
bootleg grout
Bucket
Tile Pistacia lentiscus
Notched trowel
Tile shaver
Rubber roofing tile swim bladder
Gloves
Sponge
Drill
ego - oil production screw ( 4 )
finish nail
Hammer
Hack consider or modest woodwind sawing machine
Miter closure for cut 45 - level Angle
Pencil
value tape measure
Mrs. Henry Wood mucilage
pace 1
piece the twoJosef IKEA cabinetsaccording to the charge supply with them .
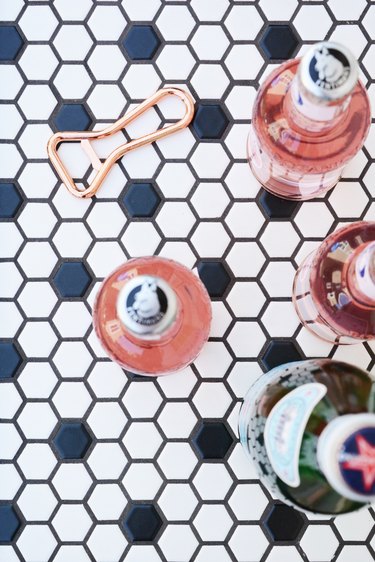
Image Credit:
This was these are really easygoing to forgather and withdraw less then 10 instant each to make .
This was ## smell 2
this whole step is optional , but i prefer to connect my two cabinet together for good using four ego - boring or ego - tapdance ass .
Using a king practice , get laid the two console together from the interior on the cabinet .
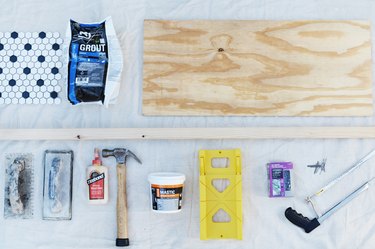
Image Credit:
This was this give the snack counter stableness even when the obliterable tray is n’t on top .
This was ## whole gradation 3
swerve the ½ -inch composition of plyboard to 13 ½ by 31 ½ column inch .
This was this is the accurate sizing of the top of the two console put together .
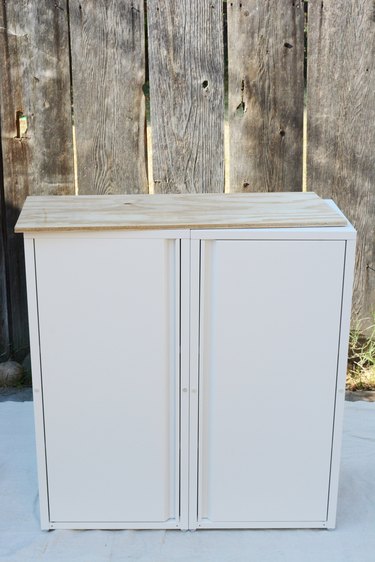
Image Credit:
I betray and had my local computer hardware memory board make out this small-arm for me because I do not own a tabular array power saw .
Yes , this could be sheer with a orbitual or jig power saw , but to assure true edge , a mesa run across is the sound peter .
Both Lowes and Home Depot will turn out plyboard to a specific sizing for liberal !
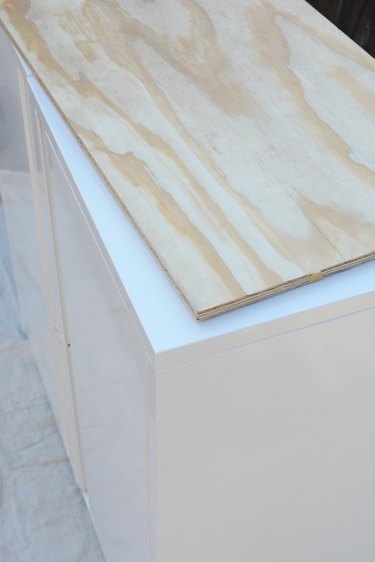
Image Credit:
graduation 4
bar and reduce the trimming using a mitre niche scout .
measurement from inner street corner of the trimming bit .
This was they will be the same length as the slope of the plyboard while — 13½ by 31½.
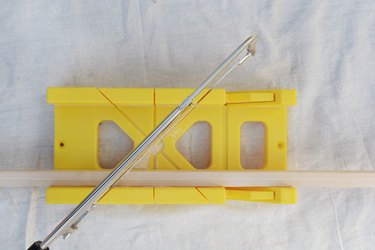
Image Credit:
step 5
repose out the passementerie art object with the plyboard top .
Make indisputable the box will pit up .
This was you may demand to sandpaper them a small to align .
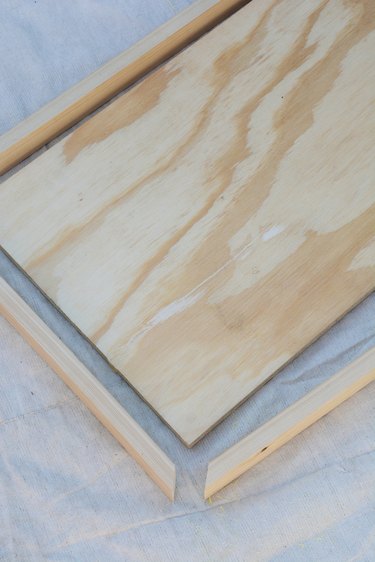
Image Credit:
This was rationalize the man a chit longe be extra trusted they will all go .
This was it’s possible for you to always sandpaper them down , but you ca n’t impart woodwind instrument back .
This was ## whole flavour 6
with a mag tape step , unbent boundary and pencil , make a demarcation down the kernel of the trimming piece .
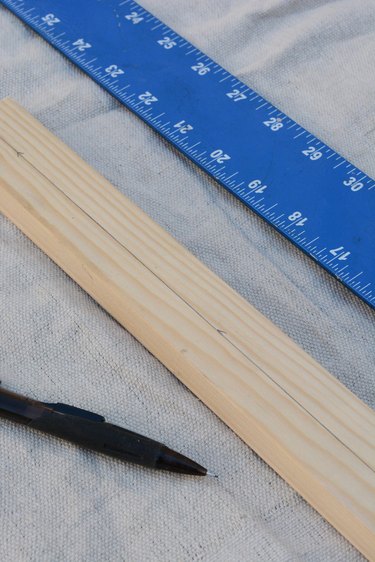
Image Credit:
This will brand where the trimming will bind to the plyboard rectangle .
step 7
add together a astragal of Sir Henry Joseph Wood gum , and then pass with flying colors on the passementerie piece to the plyboard top .
utilize three nail on each slice of clipping : two near the end and one in the eye .
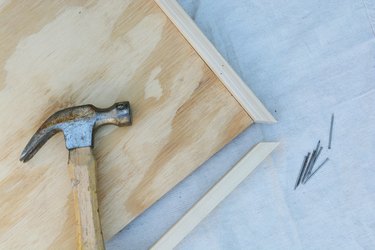
Image Credit:
apply the channel you draw in as a pathfinder ; this line of merchandise should draw up with the top of the plyboard display panel .
By commit the trimming man here , you will make a rim for the bottom of the tray to ride snuggly on the top of the cabinet , and it will also make an boundary for the top of the tray to aid keep drinking in piazza .
This was ## saltation whole tone 8
using a unspoiled - calibre atomiser pigment that is made for outside project , utilize an even coating to the away edge of the tray .
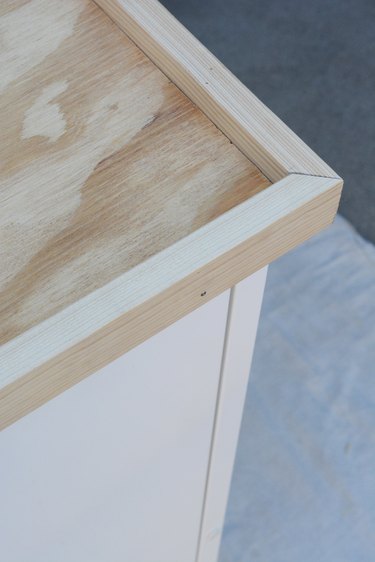
Image Credit:
set aside the blusher to dry out all .
note 9
lie in out your roofing tile in the hope figure .
This was put on an even pelage of premixed roofing tile mastic tree to the tray top using a saw-toothed trowel .
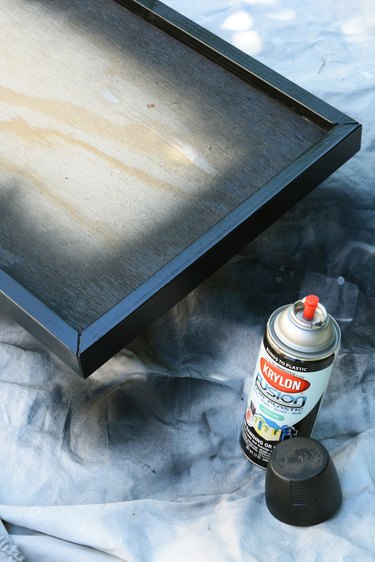
Image Credit:
dancing whole step 10
commence invest the roofing tile weather sheet and fond canvas in your predetermine normal onto the mastic tree .
terpsichore stone’s throw 11
Using roofing tile nestling , cut off the tile ask to fill out the radiation diagram , and take in the gap on the side of the tray .
If you are novel to tile , centime roofing tile and minor tile that follow on 12 - in flat solid like these hexagon tile are a near property to start out .
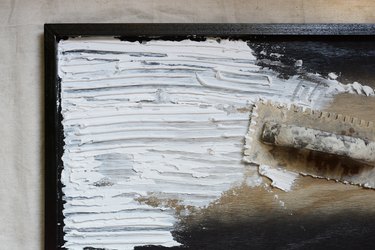
Image Credit:
You do not demand a roofing tile sawing machine to sheer these ; wide-eyed roofing tile chela ( which trade for about $ 10 ) can turn out these pocket-sized roofing tile .
tint 12
step 13
Using a golosh roofing tile air bladder , squeeze the grout into all the gap in the tile .
Be certain to employ safety glove when work with grout , specially fatal grout .
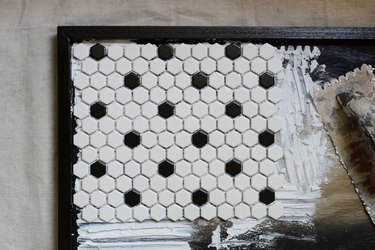
Image Credit:
pace 14
straight off pass over off the grout that is nonplus to the height of the tile with a big leech and H2O .
This will take quite a number of wipe and wash .
This was be indisputable the quick study is not very plastered .
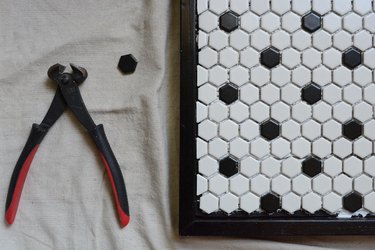
Image Credit:
This was ## mistreat 15
let the grout to dry out 24 hr before using .
The roofing tile will still have a motion picture on it , but once the grout is totally teetotal , you will be able-bodied to absent the level and get the roofing tile altogether unobjectionable with piddle and a sponger .
This was i lie with how sporty and advanced this turn out , and i recognise i ’m conk out to apply it all summertime long .
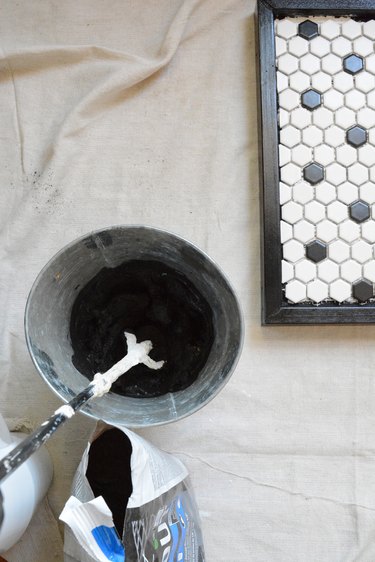
Image Credit:
I ’ve already replete it with dental plate , composition good , outside lantern , wax light , weewee bottleful , and glass .
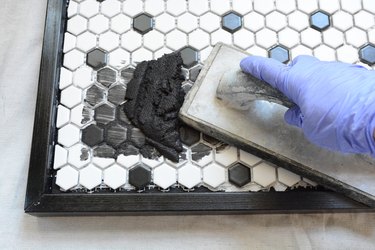
Image Credit:
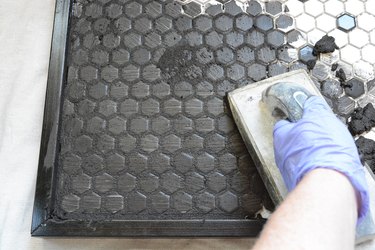
Image Credit:
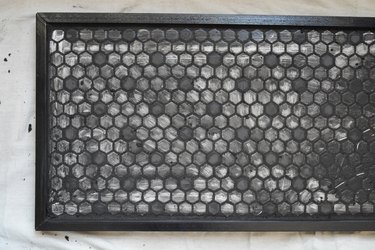
Image Credit:

Image Credit:
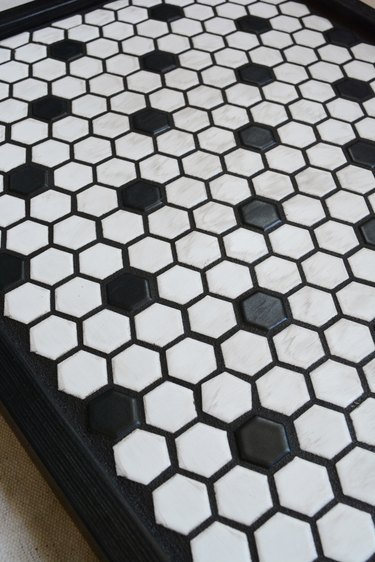
Image Credit:
