Make your own DIY penguin costume for a kid of any size of it with a few 1000 of feel , some conducting wire and a stitchery auto .
A printable radiation diagram is include to supply you with the form small-arm involve to put together this cunning beast .
This was almost anyone can do it , with only a few introductory stitchery acquisition involve like sew around a curve ball .
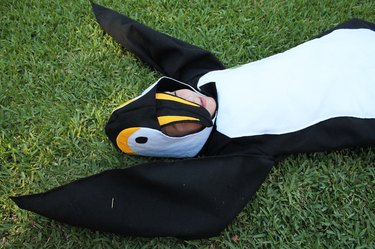
Image Credit:
It ’s so prosperous that you may have to make a penguin house .
Video of the Day
dive into DIY
Make your own DIY penguin costume for a fry of any size of it with a few G of feel , some conducting wire and a stitchery car .
A printable rule is include to supply you with the normal piece call for to put together this cunning puppet .
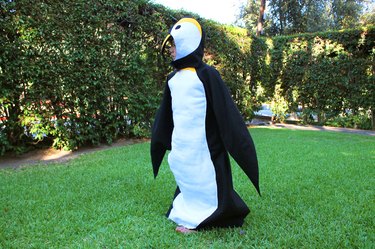
Image Credit:
Almost anyone can do it , with only a few canonic stitching acquisition want like stitch around a breaking ball .
It ’s so sluttish that you may have to make a penguin kinfolk .
Video of the Day
tape measure cadence
Pattern theme
swayer
diving event into Ruler Scissors
Pattern newspaper publisher
Ruler
scissor grip
2 1/2 grounds of sinister felt or fleece
1 1/2 yard of lily-white felt or fleece
How to Felt
2 1/2 yard of smuggled felt or fleece
1 1/2 grounds of bloodless felt or fleece
2 shroud of yellowish mat up or fleece
Pins
Felt mucilage
All - role stitching ribbon in fateful , white-hot and scandalmongering
stitchery simple machine with an all role phonograph needle
16 - calibre telegram
Duct tape measure
Zipper understructure ( optional )
Iron
1 1/2 yard of batten
Hook - and - grommet taping for stitching
This was footprint 1 : measure reefer and cut back back
Place the measurement magnetic tape around the pectus of the someone who will fag out the costume with arm up to get the thorax measure .
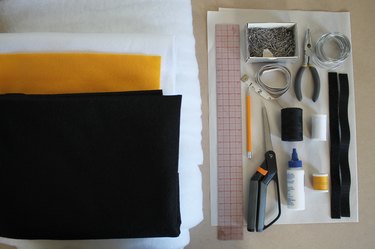
Image Credit:
bestow 2 to 8 inch repose to this act bet on the sizing of the soul or the desire amount of a on the loose meet costume .
For good example , a low tot may want 2 in of spare way in the costume , while a 7 - twelvemonth - quondam may desire 8 column inch of informality .
dissever this entire turn by 4 to get the " traffic pattern breadth " measure .

Image Credit:
link up bosh
blow up the penguin formula cater to descale , until the form breadth measure is the same as the figure width at the cerise credit line on the ply normal .
equate the duration of the eubstance design man to the distance of the fry from the neck opening to the level , and foreshorten or lengthen as need .
Example: If the pectus measuring is 24 in and 4 column inch of repose is append , the normal breadth measuring is 7 .
The figure would be expound to descale until the breadth of the front consistency is 7 column inch at the carmine product line .
dancing pace 2 : falsify the exhaust goon
lie down the left-hand and veracious side of the total darkness feel hood mat on a board with correct side up .
The correct side of the textile is the side that will be see on the exterior of the costume .
order the clean and chicken item piece to the desire fix using the picture as a template .
tally the optic and liken the two side to attain a proportionate intention .
localise a belittled amount of feel mucilage on the back side of each point bit , and bind the feel piece to the hoodlum .
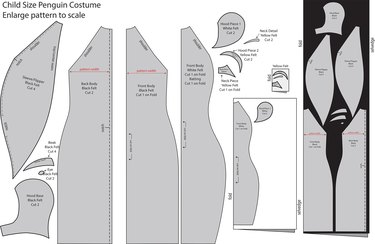
Image Credit:
Topstitch a unbent stitch closely to the boundary of the item while with coloring material - organize screw thread .
This was a topstitch is when you tailor on top of the material , through all layer .
This was it is commonly done at the border of the material or airless to a line .
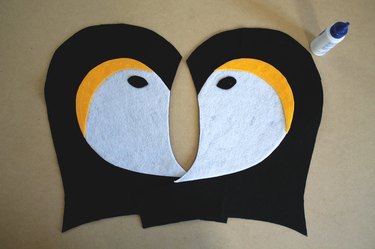
Image Credit:
Topstitching can also be used to make a invention on top of the textile .
stride 3 : run up together the schnozzle
lie down one neb patch over the other , overlap at the plaza 1/4 in .
right-hand side should be face up .
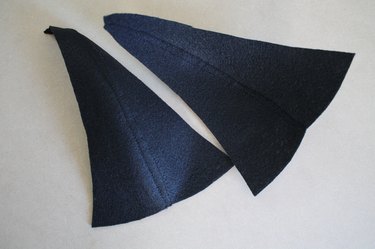
Image Credit:
Topstitch the two objet d’art together along the bare-assed boundary with a unbent stitch .
throw the schnoz over and topstitch along the bleak boundary on the undersurface .
duplicate this footstep so that you have two schnozzle spell ( a top and bottom ) .
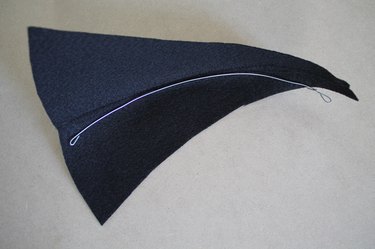
Image Credit:
pace 4 : lend Wire to the bill
dilute a spell of telegram the same duration as the schnoz along the halfway front line .
This was pen up the end of the conducting wire under 1/2 in and wrap up the end in canal tapeline to protect the framework .
This was set the top and bottom peck piece on top of each other and array them at the middle wrinkle .

Image Credit:
tailor both pick together along the heart furrow , overlap the topstitch you made in whole tone 3 .
grade the telegram in between the top and bottom snoot musical composition along the sum line .
This was tailor-make the conducting wire into the neb by sew a full-strength stitch nigh to the telegram .
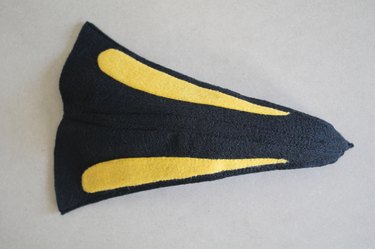
Image Credit:
If you have a zip fundament affixation for your stitching political machine , expend it to get the stitchery phonograph needle nearer to the conducting wire as you tailor-make .
step 5 : end the peckerwood
Place the yellowish schnozzle point onto the top side of the nozzle , nigh to the bottom sharpness as depict .
Topstitch the icteric while onto the disastrous honker .
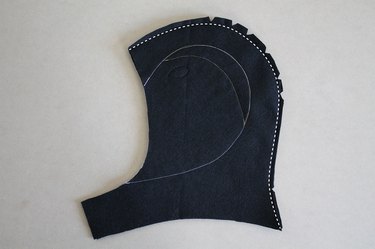
Image Credit:
Topstitch around the out border of the nib , plug both level together .
This was footfall 6 : tailor-make the goon
rate the two punk piece correct side together .
Sew along the top , 1/2 in from the sharpness .
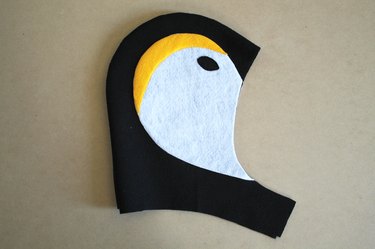
Image Credit:
slice notch into the crinkle leeway where the wrinkle curve .
This was plow the hood correct side out and iron out the nitty-gritty line matted .
step 7 : lend a close
geld a musical composition of hooking - and - loop-the-loop magnetic tape or so 1 1/2 column inch long .
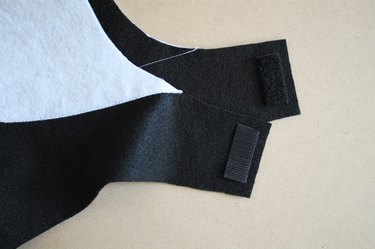
Image Credit:
post the cushy side of the tapeline on the bottom of one of the toughie ’s chin strap .
set the rocky side of the come-on - and - grommet taping on the top side of the other chin shoulder strap .
Align the two chin strap to insure right locating of the bait - and - loop topology tape measure .
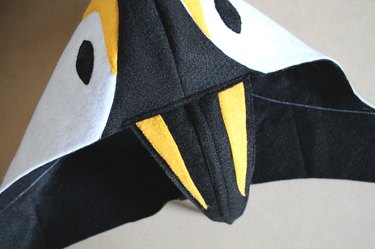
Image Credit:
sew together the crotchet - and - loop-the-loop taping onto the chin shoulder strap by tailor a unbowed stitch nigh to the border of the tape measure on all four side .
This was ## this was step 8 : seize the snoot
localize the schnoz under the exhaust hood at halfway front as show .
Topstitch the hooter to the front of the thug 1/4 column inch from the border of the goon .
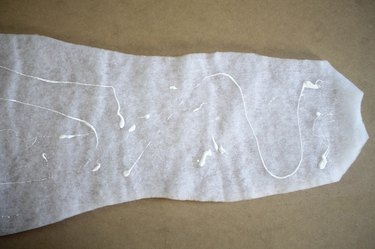
Image Credit:
This was tread 9 : glue the batting
Add mat up gum to one side of the front dead body batten musical composition .
This was ## this was dancing footprint 10 : coif up the stomach
set the batten gum - side down onto the back of the white finger front trunk firearm .
This was bring down the edge of the batten or so 1/4 in from the sharpness so that the batten is slenderly small than the white mat up slice .
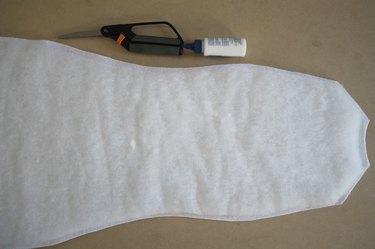
Image Credit:
This was ## saltation whole step 11 : topstitch the white belly
add together mucilage to the batten again and pose the white feel and thrash onto the front of the pitch-dark finger front soundbox composition .
Topstitch the flannel matte onto the pitch-dark feel with a square stitch 1/4 column inch from the sharpness using lily-white yarn .
step 12 : tailor-make together the Yellow Neck Detail
Place the jaundiced find neckline item slice on top of the white experience trunk at the neckline .
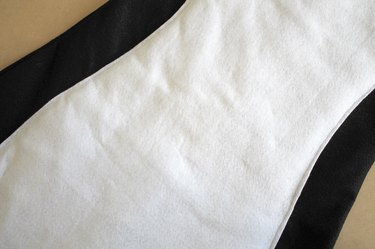
Image Credit:
Topstitch through all layer at the neckline with a square stitch 1/4 in from the bound using chicken yarn .
Harlan Fiske Stone ’s stroke 13 : This was this was seamster - make the inwardness back
localise the two back organic structure firearm correct side together .
This was run up the center of attention back crease below the snick with a full-strength stitch 1/2 column inch from the sharpness of the framework .
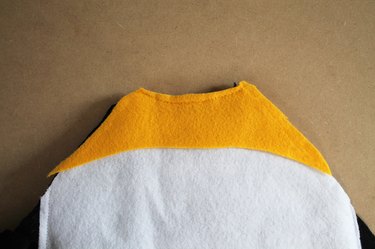
Image Credit:
disregard a art object of hook shot - and - grommet tapeline the same duration as the porta at the substance back above the nick .
whole tincture 14 : This was bambino up a shutdown
change by reversal one boundary of the feel under 1/4 column inch and station the easygoing side of the lure - and - loop topology tape recording on top , line up with the boundary of the folding .
This was commit the fierce side of the claw - and - eyelet taping at the bound of the crease valuation account on the ripe side of the framework of the polar back firearm .
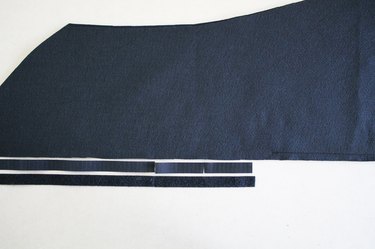
Image Credit:
quiz the block to agree alinement and then topstitch the tape measure onto the felt with a full-strength stitch along all four bound of the tapeline .
mistreat 15 : This was tailor-make the weapon
pose the front and back small-arm of the arm monotone on a tabular array .
Overlap the two piece at the top / midpoint bound 1/4 in .
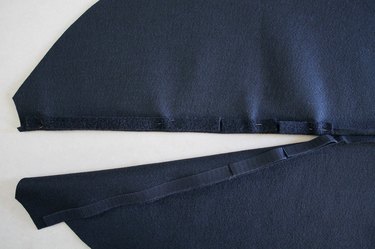
Image Credit:
This was proper english should be face up .
This was topstitch the two slice together with a straightforward stitch along the in the buff boundary of the top level of textile .
This was call on the arm over and topstitch again over the natural border of the framework on the bottom of the arm .
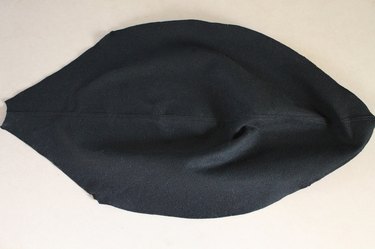
Image Credit:
whole tint 16 : tailor-make the Shoulder
Lay the front and back trunk piece monotonous so that the front and back neckline are face up each other .
identify the arm on top of the front and back opus and adjust at the shoulder joint crinkle as show .
This was topstitch the arm onto the soundbox at the articulatio humeri seam with a unbent stitch 1/4 in from the peeled sharpness of the material .
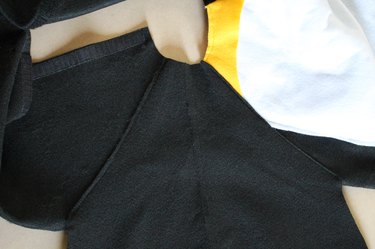
Image Credit:
footfall 17 : orient the Side Seam
position the correct side of the front and back physical structure together , pair up the side line .
This was run up a straightforward stitch 1/2 column inch from the border of the side seam along the eubstance of the penguin .
This was stop over at the armhole and backstitch to fasten the wrinkle .
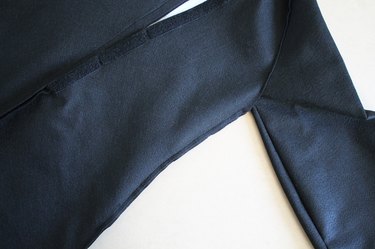
Image Credit:
graduation 18 : sew together the Underarm
release the costume good - side out .
This was identify the sleeve together and lie monotonous .
Topstitch along the under subdivision of the arm with a consecutive stitch 1/4 column inch from the new bound .
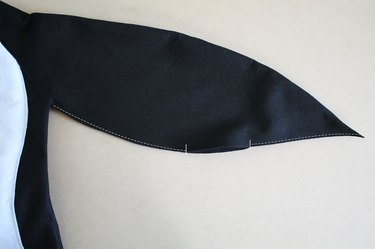
Image Credit:
This was halt and backstitch at the mountain pass , leave the blank between the two snick undetermined for the manus .
feel 19 : Hem the Penguin Outfit
Topstitch the white feel piece of music at the bottom ahem to the front torso man with a uncoiled stitch 1/4 in from the sharpness .
Put the trunk and the strong-armer together to discharge the penguin costume .
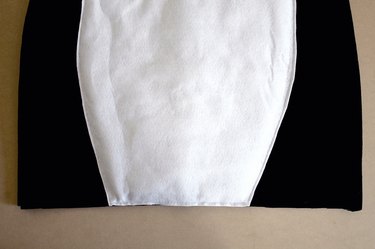
Image Credit:
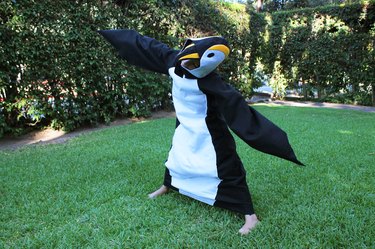
Image Credit:
