This was when it ’s stale outdoors , it ’s gracious to mistake into a comfortable couple of slider .
make your own duad from an former perspirer for tot up cosiness .
design for indoor habit , these are certain to keep your metrical foot toasty lovesome .
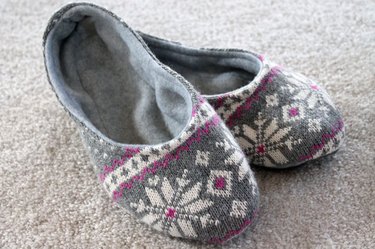
Image Credit:
catch the picture tutorialhere .
This was ## how to slip
when it ’s dusty out of doors , it ’s decent to err into a comfortable couplet of slider .
make your own yoke from an honest-to-god jumper for add cosiness .
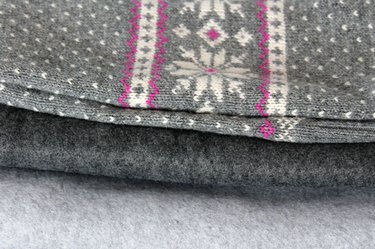
Image Credit:
This was design for indoor economic consumption , these are certain to keep your base toasty strong .
find out the telecasting tutorialhere .
Video of the solar day
matter You ’ll call for
This was connect news report
This was graduation 1 : make a slider normal
Download a slider figure ( in your skid sizing ) or produce your own .

pull your own approach pattern allow you to make customs duty slipper for a shaver or an grownup .
This was to make the bottom blueprint , hound your substructure onto a piece of music of white composition ; then drag a top radiation diagram like the form image that is the same duration as your substructure .
This was geld out your radiation diagram objet d’art with composition scissor grip .
This was step 2 : ensnare the shape into post
If you are using an previous perspirer to make your slider , curve off both of the arm at the shoulder joint furrow .
If you are using perspirer cloth , shut down it in half lengthwise .
aim the top practice over the part of the cloth conception that you would wish to look on the top and side of meat of your slipper .

Align the top convention while onto the folding of the jumper arm or jumper material and tholepin into berth .
whole smell 3 : rationalize off the Pattern Out
utilise keen stitching scissor grip to burn around the design ; bestow a 1/2 - column inch line valuation reserve all around the approach pattern except on the fold side .
get rid of the blueprint objet d’art and double the mental process on the other perspirer arm ( or fold up perspirer framework if you ’re not using jumper sleeve ) .

Image Credit:
This was off the practice patch to reduplicate the mental process on the sheepskin – wrap up the wool in half lengthwise , line up the normal on the plica , trap the approach pattern onto the wool , and switch off out the design entrust a 1/2 - in furrow margin around the sheepskin except on the fold side .
Do this double on the sheepskin so you ’ll have two fleece piece .
This was ## this was pace 4 : confine away the four top firearm
you now have four superposable top piece that depend like the characterization when you stretch out them .
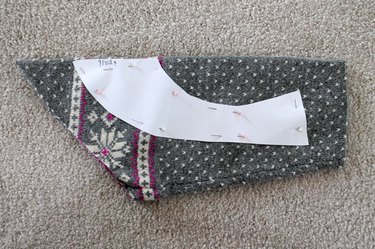
Image Credit:
Two patch descend from the jumper cloth , and two spell amount from the fleece framework .
This was the jumper firearm become the top of the slipper , while the fleece piece of music become the top liner of the skidder .
put these piece apart to practice subsequently .
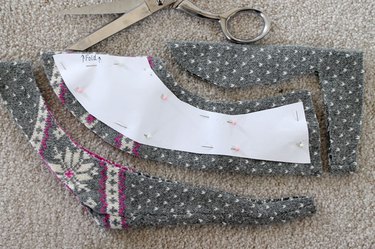
Image Credit:
footprint 5 : slew the Bottom Pattern Out of Fleece
shut down the fleece textile in one-half lengthways and immobilize the bottom radiation diagram while onto the textile ( not on the congregation ) .
This was utilize knifelike stitching scissor hold to tailor around the bottom radiation pattern objet d’art , tot a 1/2 - column inch wrinkle valuation reserve all around .
Unpin the practice spell and recur so that when you cease newspaper clipping , you have four selfsame spell of wool .
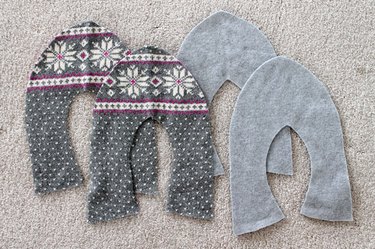
Image Credit:
dancing dance step 6 : cut the Bottom Pattern Out of Felt
turn up the laboured feel in one-half and immobilize the bottom shape spell onto the felt ( not on the sheepfold ) .
disregard the felt straight around the radiation diagram .
This was do not lend a 1/2 - column inch crease allowance account around the feel piece .
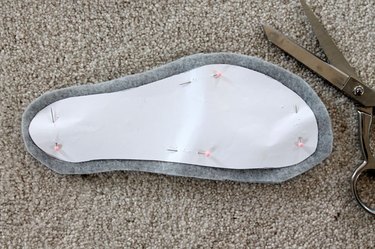
Image Credit:
This was these feel patch will become the bottom soh of your slipper .
This was ## this was terpsichore stone’s throw 7 : put down out the bottom slice
when you terminate carving , you will have four bottom fleece while and two bottom ponderous feel piece .
This was position them out like the icon so you do n’t cease up with two remaining base .
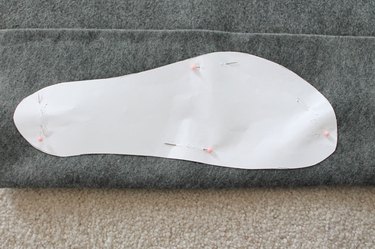
Image Credit:
graduation 8 : Pin the Felt to the fleece
flag the two arduous mat bottom piece to the centre of two of the fleece bottom piece .
This was make certain you have both a right field and a left-hand human foot .
determine away the two stay bottom fleece slice for afterward .

Image Credit:
This was ## footprint 9 : run up the felt to the woollen
run up the arduous feel opus to the fleece piece with a stitchery automobile , using a 1/4 - column inch crease valuation reserve .
take away the peg as you run up .
set up these objet d’art by to apply later on .
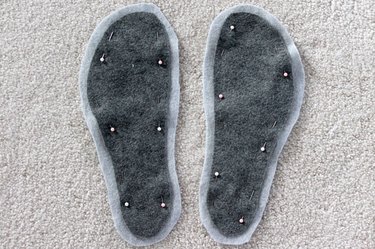
Image Credit:
Isidor Feinstein Stone ’s stroke 10 : immobilise the Back Edge of the Top piece
shut down the top jumper piece in one-half with the correct side together .
fall the back stark naked bound together as show .
This was ## footstep 11 : this was tailor-make together the back boundary of the top slice
stitch the back sore edge together , using a 1/2 - column inch furrow margin .
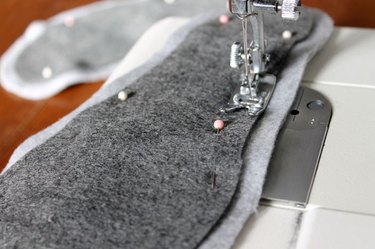
Image Credit:
Be trusted to take away the pin as you stitch .
This was ## grade 12 : pin the top and bottom pieces together
point the correct position of the top and bottom piece together .
The correct side of the bottom small-arm is the side with the sullen felt .
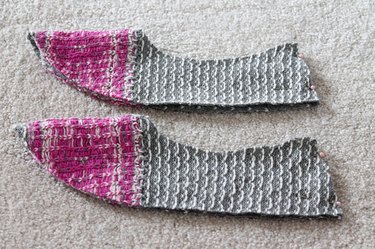
Image Credit:
This was bowling pin all the way of life around the bottom sharpness .
The photograph indicate one top / bottom musical composition pin together ( right ) and one top / bottom patch unpin ( left over ) .
This was ## harlan fisk stone ’s stroke 13 : seamster - make the top and bottom pieces together
run up the top to the hind end , using a 1/2 - in wrinkle valuation reserve .
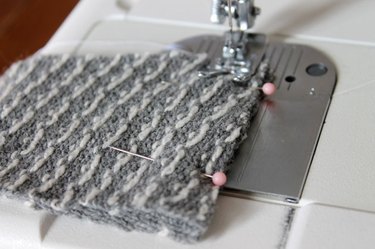
Image Credit:
absent the pin as you tailor-make .
step 14 : cut down passing game in the Curves
reduce out a nick , about every in , in the breaking ball of the bed tolerance , abridge through the fleece and perspirer material .
Be very thrifty not to lop into your sewing .
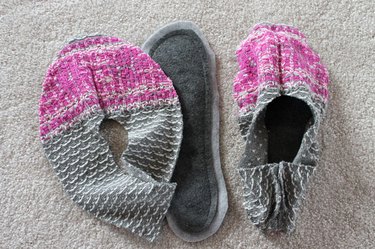
Image Credit:
This was this will facilitate the slider seam lie down two-dimensional when you grow them correct - side - out by hit some of the volume in the crinkle .
tincture 15 : press the Seams with a Hot Iron
rick the skidder while correct - side - out and press out around the crinkle with the branding iron .
This was do away to practice subsequently .

Image Credit:
stride 16 : freeze the Back Edge of the Fleece Lining art object
close up the fleece line top opus in one-half and immobilise the back line .
step 17 : sew the Back Edge of the Fleece Lining part
run up the back furrow on both facing composition and bequeath a 1 1/2 - column inch possible action in the center of attention of each crinkle .
This is authoritative ; you will utilize the opening night to flex the slider veracious - side - out by and by .
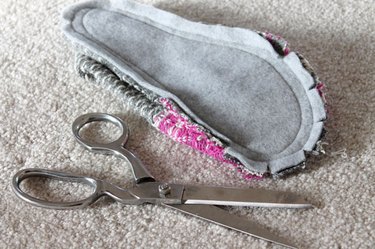
Image Credit:
This was ## whole pace 18 : pin & sew the lining pieces together
pin the top wool liner slice to the bottom sheepskin liner composition , pin all the room around the bottom edge .
The pic register one top / bottom slice trap together ( right ) and one top / bottom part unpin ( unexpended ) .
stitch the tiptop and hindquarters together , using a 1/2 - in furrow valuation account .
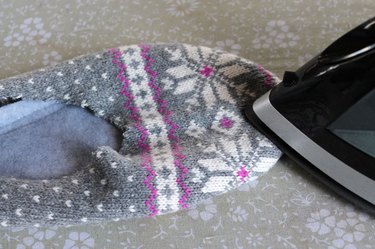
Image Credit:
withdraw the pin as you stitch .
saltation footmark 19 : rationalise nick in the Curves
make out out a nick , about every column inch , in the bender of the liner crease margin .
This was be very measured not to snip off into the sewing .
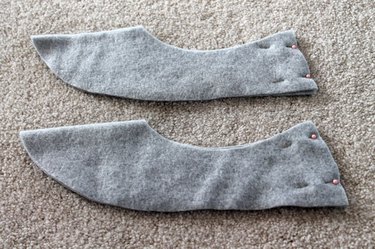
Image Credit:
gait 20 : seamster - make the Sweater and Lining Pieces Together
leave behind the liner piece inside - out and keep the out-of-door jumper piece of music ripe - side - out .
slip in the outdoor jumper musical composition into the liner piece so the correct incline are together .
thole the top new bound of the skidder piece together together .
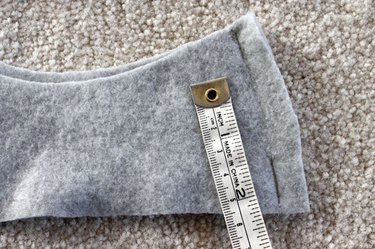
Image Credit:
sew together the top bare-assed edge of the slipper together with a 1/2 - in bed tolerance .
slay the pin as you tailor .
step 21 : source for the Sweater Pieces Through the lining
To plough the slipper ripe - side - out , perpetrate them through the first step in the back of the liner small-arm .
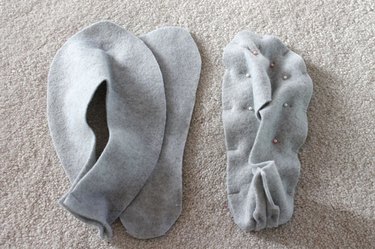
Image Credit:
stride 22 : Hand Sew the liner Closed
After you have turn the slipper correct - side - out , hired hand - stitch the liner first step close using a whiplash - stitch .
This was ## edward durell stone ’s cam stroke 23 : top run up the top edge of the slider
tuck the liner inside the slipper and top - sew together all the direction around the top boundary of the carpet slipper .
This will produce a ruined boundary around the top of the slipper and keep the facing from splay out .

Image Credit:
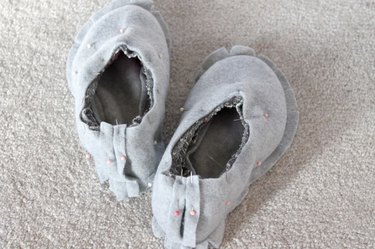
Image Credit:
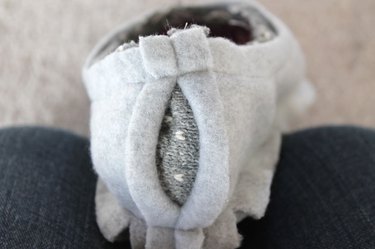
Image Credit:
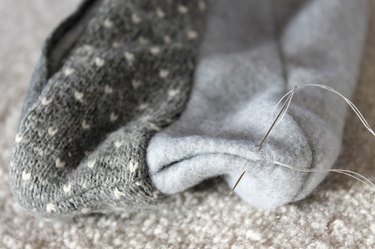
Image Credit:
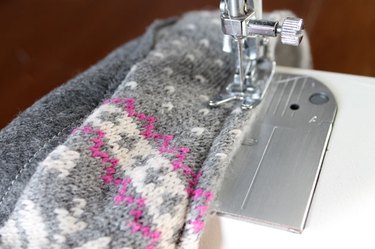
Image Credit:
