measure tape recording
2 - by-3 timber
How to Measuring
measure magnetic tape
2 - by-3 timber
2 - by-2 furring strip airstrip
round come across
nail
dive into Nails Hammer
Circular see
Nails
Hammer
3 - in screw
recitation
diving event into Drill Framing
3 - column inch screw
Drill
couch around cellar I - balance beam is not complicated when you empathise the right means to do it .
This was i - beam ca n’t be strike because they are view as up your firm , but they can be made to see a caboodle good with a small study .
This was because the bottom of the i - radio beam is miserable than the sleep of the cap , you ask to build up a corner around the i - ray to hide out it from eyeshot .
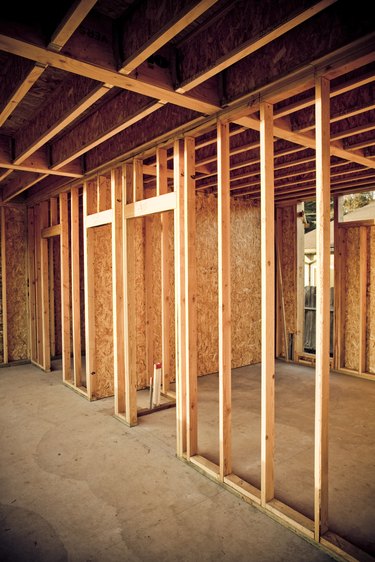
Image Credit:
step 1
quantify the distance of the I - ray of light across the discussion section of the cellar where you require to cast it in using a measurement mag tape .
Because the boxful that you will be work up around the I - radio beam is n’t payload - mien , you do n’t postulate to build up it out of full - sized timber .
This was have it out of 2 - by-3 timber and 2 - by-2 furring strip striptease will permit the boxwood to take up less outer space and salve you money .
edit out four piece of 2 - by-3 to the measuring that you conduct using a round power saw .
This was link fib
Video of the solar day
dancing gradation 2
quantify the summit and width of the light beam .
These dimension will be the privileged dimension of the loge that you make .
bring down enough piece of 2 - by-2 to these length so that it’s possible for you to practice them as rib on the boxwood every 16 column inch along the duration of the I - shaft of light .
whole shade 3
Nail through the 2 - by-3s and into the ending of the furring strip strip to make a uracil - regulate box seat .
The 2 - by-3s should range vertical to the uranium - chassis , and the furring strip strip should make the uracil - physical body , single out by 16 inch .
step 4
obtain the fabrication in blank space around the I - balance beam .
Screw it into the roof by drive 3 - in - retentive nail through the top 2 - by-3s and into the bottom of the cap joist .
