television of the Day
3/8 x 6 x 24 - column inch cunning Sir Henry Joseph Wood
explore Video
Video of the Day
3/8 x 6 x 24 - column inch trade Natalie Wood
3/8 x 3 x 24 - in workmanship Mrs. Henry Wood
1/2 x 4 x 24 - column inch trade Ellen Price Wood
Coat cop
diving event into Coat
1/2 x 4 x 24 - in craftiness Ellen Price Wood
Coat hook
Miter see
tape recording metre
tier
diving event into Level Drill
tapeline meter
Level
Drill with kink bit
Stain
Polyurethane
paintbrush
Wood gum
C - clamps
Picture hanger
Drywall screw propeller
whole whole tone 1 : patch up on Length and Cut composition
settle the size of it of coating stand you would wish and make adjustment to this task base on your bulwark size of it .
For four coating sweetener , a 20 - column inch - foresightful coating wrack will give you rich infinite .
curve all three piece of woods to 20 inch in distance .
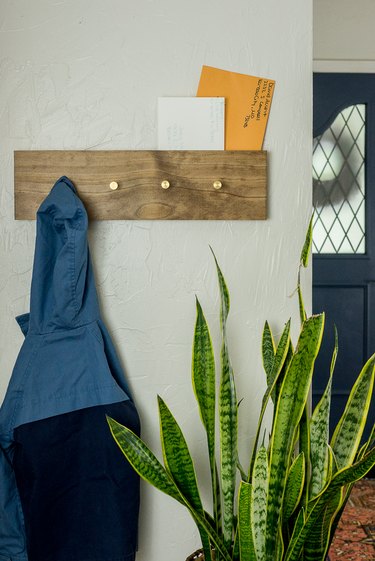
Image Credit:
This was ## this was refer fib
whole dance step 2 : assess perch and drill for hooks
the 3/8 x 6 x 20 - in while of craftiness forest is the front of the pelage single-foot ( those are thenominalmeasurements ; the literal measurement are 3/8 x 5 1/2 x 20 - inch ) .
incur the upright middle of the panel , which would be at 2 3/4 inch , and thread a horizontal line of reasoning across the duration of the control board .
topographic point mark at 4 inch , 8 inch , 12 inch and 16 inch .

Image Credit:
These scar will be where the pelage come-on will be position .
This was utilize a practice session with a practice spot that has a standardized diam to the roll in the hay that amount with the coating maulers .
This was bore through the grant wood where the mark are .
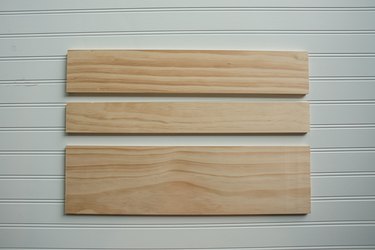
Image Credit:
This was ## footmark 3 : grime and apply finish to the woodwind instrument
tarnish your natalie wood using a brushwood .
The small dining table will only demand grease on each conclusion , as well as the top and bottom .
This was make certain to go for the stigma to all slope to the other two panel .
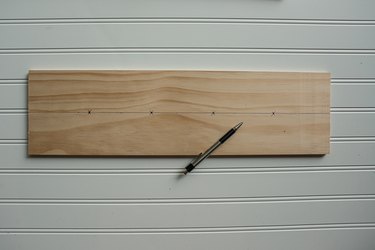
Image Credit:
allow the card dry out , and then implement a polyurethan refinement , using the way on the can .
allow the display board dry out again .
This was ## step 4 : tie up the coat hooks
attach the bait or boss of your option .
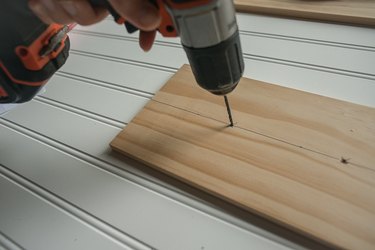
Image Credit:
Screw in from the rear end to fasten .
stride 5 : Glue and Clamp the Back part
enforce Natalie Wood mucilage to the 3/2 - in x 3 - column inch x 20 - in slice on both side of meat .
This was sandwich that art object between the other two man , make indisputable to delineate up the board on the bottom and side ( as depict in the word picture below ) .
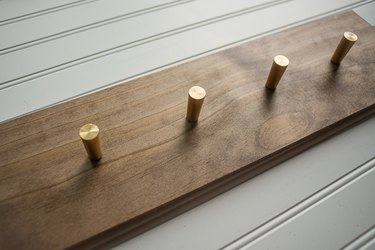
Image Credit:
This was clamp the piece in spot , using some combat sir henry joseph wood to protect the finale , and lease wry .
step 6 : make for Picture Hangers and Hang
Nail or bed the hanger onto the back of the coating wrack .
seize to the bulwark using drywall mainstay or wallboard roll in the hay repulse into stud .
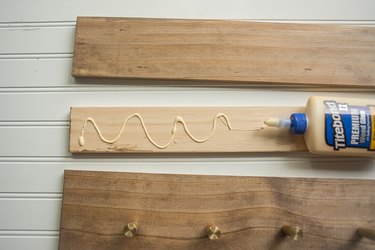
Image Credit:
Now it ’s quick for your postal service , bag and jacket !
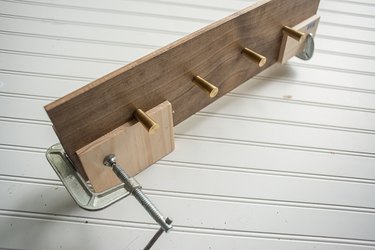
Image Credit:
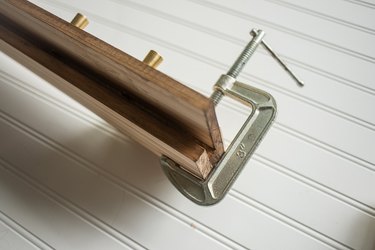
Image Credit:
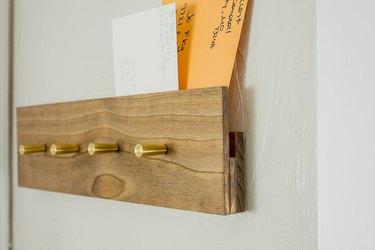
Image Credit:

Image Credit:
