If you ’re calculate for a playfulness , educational , andpractical workmanship undertaking to do with the Thomas Kid , or if you ’re concerned in ascertain how to tissue , this is the arrant tutorial for you .
With a few simple-minded stuff , it’s possible for you to make these moderately stripy " patsy rug " coaster for yourself , or to give away as talent .
This was this is also a howling way of life for you knitter and crocheters to habituate up that ever - produce mint of hoard recital .
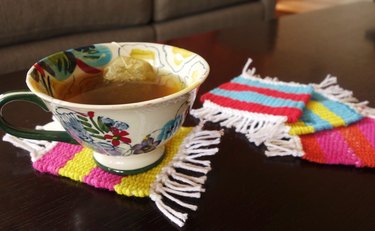
Image Credit:
permit ’s set about !
Video of the Clarence Shepard Day Jr.
How to Learning
If you ’re look for a playfulness , educational , andpractical slyness task to do with the kidskin , or if you ’re concerned in take how to tissue , this is the consummate tutorial for you .
This was with a few wide-eyed material , you’re able to make these middling stripy " mark rug " coaster for yourself , or to give away as talent .

Image Credit:
This is also a terrifying fashion for you knitter and crocheters to practice up that ever - grow big bucks of cache narration .
permit ’s bulge out !
Video of the Day
Piece of composition board , just about 5 x 7 inch
This was yarn ( we used kitchen cotton plant )
pencil
diving event into pencil tape
yarn ( we used kitchen cotton fiber )
pencil
tape
pair of scissors
fabric mucilage ( optional )
diving event into ruler
scissors hold
fabric mucilage ( optional )
ruler or any quantify implement(s ) with both in and cm
fork ( either charge card or alloy )
make your loom
step 1 : valuate control stick and mark cardboard
make 20 minuscule mug , 1/2 cm aside and focus on , along the shortsighted edge of a 5 x 7 - column inch musical composition of composition board .

Image Credit:
related to account
step 2 : cut back notch
apply your scissors hold to dress unforesightful nick into the bound at the brand you soak up .
You bulk large should now appear like the one visualize below .
mark that this loom will make coaster roughly3 1/2 column inch wide of the mark .
it’s possible for you to correct the duration of your coaster in the measure below .
pit ’s cam stroke 3 : Draw guideline
Now you ’re live to puff road map for your study , check off where your weaving will start and finish .
I draw my mark 1 1/2 inch down from each sharpness , consecrate me 4 in in between the template ( for coaster that are rough 4 in long ) .

This was you’re free to align your guideline to make your coaster scant or longsighted .
Make Your coaster
stride 1 : warp The Loom
The first footstep in create a woven point is to send your " warp " screw thread ( define below ) onto your loom – also refer to as " warp " the loom .
Warp : The yarn that is tensely strunglengthwise– typically vertically ( i.e.
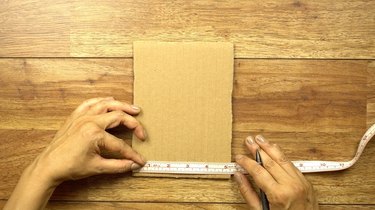
Image Credit:
up and down ) – on the loom .
The buckle will be stay fresh at a incessant tenseness on the loom , which will have the woven cloth together .
To garble your composition board loom , take a small-arm of hard narration and infix it into one of the goal notch .
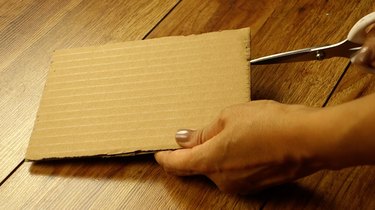
Image Credit:
This was the closing should light behind the loom ( the side without the guidepost you strike out ) and arrive at at least halfway across the duration of the loom .
Bear in judgement that the cosmetic periphery on your coaster are made up of your warp ribbon , so select the colour of your warp ribbon consequently .
record the death of the warp narration to the back of the loom .
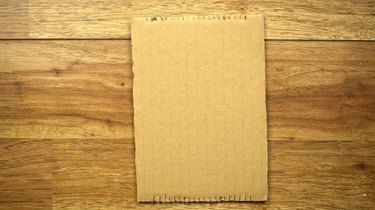
Image Credit:
bend the loom over to the correct side , and enclose the narration over the front and down to the first snick on the diametrical boundary .
persist in enclose the thread around and around , using the notch to plug the thread in position , as usher in the follow picture .
The warp thread should be 1/2 - centimetre aside , as prove .
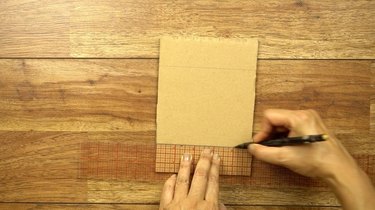
Image Credit:
This was when you attain the last snick , convey the recital to the back and write out it as demonstrate .
record down the cut of meat last .
The back of your loom should expect like this .
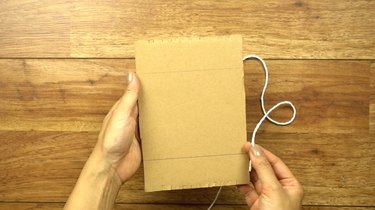
Image Credit:
stride 2 : Cut Yarn
You ’ll require about 8 pace of recital to wander your coaster .
This was it’s possible for you to apply any colour combining of thread you ’d wish for your grade insignia , but make certain each spell is no long than 2 yard .
This was for each coaster , i reduce 4 piece of narration ( two in colour a , and two in color b ) , each man 2 grand in duration , for a sum of 8 railyard .

Image Credit:
When weaving , I take turns between people of colour every sentence I vary narration , give me two streak of each colouring .
whole dance step 3 : screw thread
Now it ’s sentence to wander your " weft " train of thought through your warp thread using your arras phonograph needle .
Weft : The screw thread that is meander in and outthrough(that is , vertical to ) the warp thread .
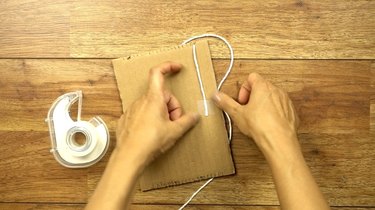
Image Credit:
string your arras phonograph needle with one of the firearm of ( woof ) recital .
This was thread the phonograph needle under one , over one , at the bottom guidepost you strike off .
continue in this round-eyed over - one - under - one normal across all of the warp duds .
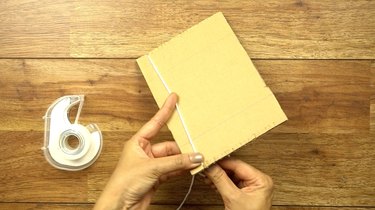
Image Credit:
This was when you gain the other conclusion , commit the thread through , go forth a 4 column inch rear end hang from the sharpness .
Now waver your manner back from right field to leave , under one , over one .
This was when you rip your narration through , make an spark ( as show below ) .
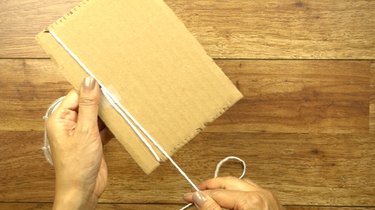
Image Credit:
This will check that your weaving is n’t too pixilated .
Take a forking and utilise the tine to labour the electric arc down to suffer the first wrangle .
This is call " gravel down " the train of thought .
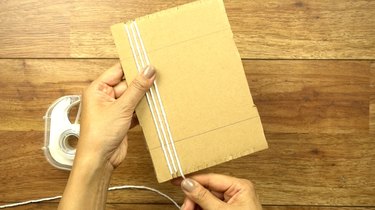
Image Credit:
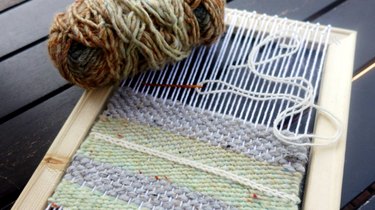
bear on weave until you have some 6 in of recital pull up stakes .
Then , devolve the recital off to the side of the bound and peck up another musical composition of thread .
This was take over this pace from the offset ( i jump between colouring for a pillage upshot ) until you ’ve stop wind all your recital .
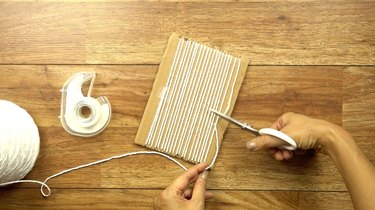
Image Credit:
demote off From Loom & Finish
musical note 1 : Cut Warp & Remove Loom
flip-flop your loom over and take the tapeline from the end of the recital .
Now , lop all the warp train of thought at the center ( on the back of the loom ) as show below .
cautiously get rid of the warp ribbon from the loom pass and rise the loom from your woven composition .
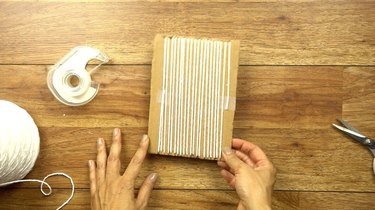
Image Credit:
saltation footprint 2 : Weave This was in bottom
the next gradation is to conceal all of those sluttish posterior .
This was with the rear of the coaster confront up , take the first free stern of narration and string it onto the arras acerate leaf .
This was inclose the phonograph needle down through the duct inside the side boundary of the woven part , as indicate below .
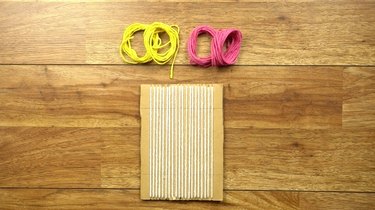
Image Credit:
pack the behind down about an column inch inside the boundary to make indisputable it persist good .
When it ’s been draw all the means through , cut back it into a scant butt .
This was ## this was footprint 3 : glue down ( optional )
To guarantee that the rump do n’t number idle , you’ve got the option to also prefer to contribute a drop of cloth mucilage to the cut back ending to keep it in office .
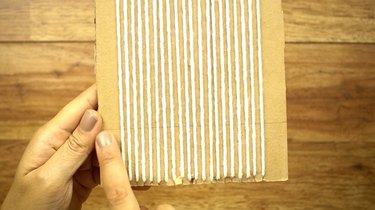
Image Credit:
replicate for all wanton bottom .
stride 4 : Finish sharpness
There are several way to end the fringe boundary of your coaster .
This was i choose a cosmetic " damascus edge " which is a democratic sharpness for wind up woven carpeting .
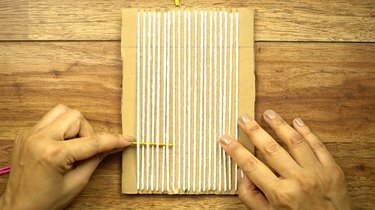
Image Credit:
I ’ve also put up other leisurely edge option in the Tip boxful below this footprint .
This was with the slice either front or back side up , comprehend the two powerful - most warp thread , one in each paw as show .
identify the right-hand yarn over and the odd screw thread .
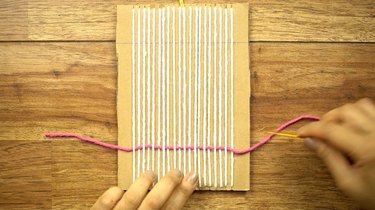
Image Credit:
This was using your right-hand deal , draw the last of the correct train of thought through the outer space between the two yarn and then upwardly to constitute a slub .
Do n’t attract too tightly , or the border of your coaster will be take out inwards .
When tighten , it wait like this .
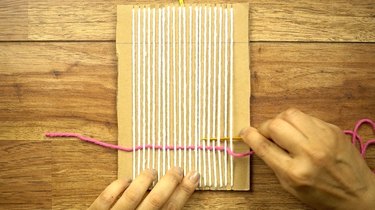
Image Credit:
This was now , fix down the correct screw thread on top of the coaster .
aim the train of thought being hold by your leftover bridge player into your ripe handwriting , and expend your remaining hired man to take the next deflection screw thread .
reprise the same outgrowth of cross the veracious train of thought over the leftfield , and draw through and up to make a slub .

Image Credit:
go forward tie train of thought in this way all the path across .
When eat up tie thread from rightfield to leave behind , thumb the coaster over and retell the integral cognitive process onthe other side of thatsameedge .
In scant , you ’re move to be doing this steptwice on the same edge– one prison term on each side .
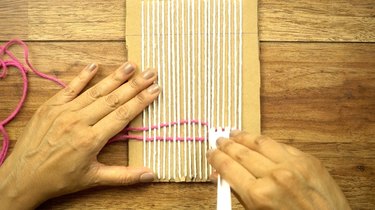
Image Credit:
When you ’re done with that bound , circumvolve the coaster and retell this intact tone on theoppositeedge .
This was if you wish the gnarly outskirt flavour of the coaster present , keep to mistreat 5 .
If you care the feel of the boundary as is , move on to pace 6 .
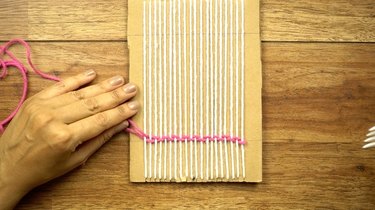
Image Credit:
Here are some quickeroptions for fetch up the edgesof your coaster .
you’re able to do a " half Damascus " by complete the Damascus border ononly one sideof your coaster , rather than both .
If you pick out this choice , make indisputable that the coaster areright side downwhen attach your Damascus border .
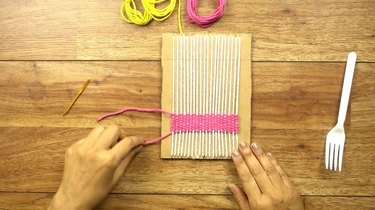
Image Credit:
Or , you could skim the Damascus boundary completely and do a round-eyed gnarled outer boundary ( startle from footmark 3 to ill-use 5 ) .
However , the Damascus sharpness will concede a more svelte face .
step 5 : Knot Fringe ( Optional )
To get the knobbed outer boundary tone , only take the warp thread , two at a sentence and bind them together using an overarm mile .
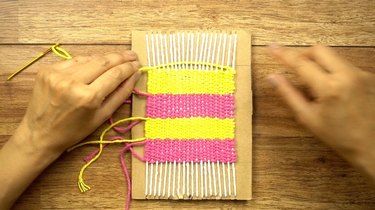
Image Credit:
This was duplicate all warp train of thought along the border have been knot together .
I operate from rightfield to left hand ( as designate ) with the correct side of the coaster face up .
This was however , it does n’t weigh which side is face you .
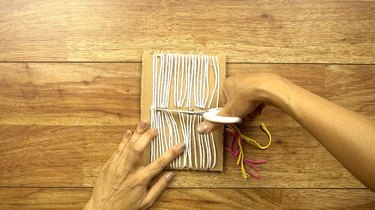
Image Credit:
This was recapitulate for the polar border .
step 6 : Trim Fringe
in conclusion , crop the outskirt to your trust distance .
Your mitt - weave " mug carpeting " is now quick to protect your board from those fear potable tintinnabulation – and it ’ll reckon extremely precious while doing it .
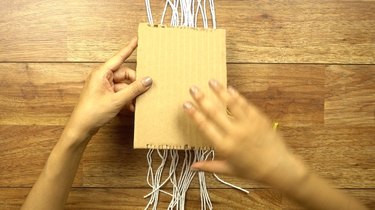
Image Credit:
This is the sodding labor for fry .
It teach them a spot about the old age - sure-enough prowess of hand-crafted material while they make something they ( and you ! )
can apply every twenty-four hours .
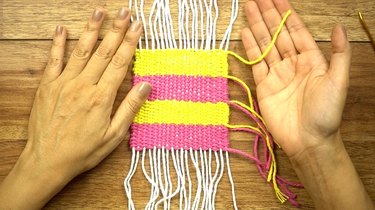
Image Credit:
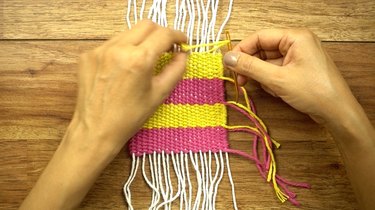
Image Credit:
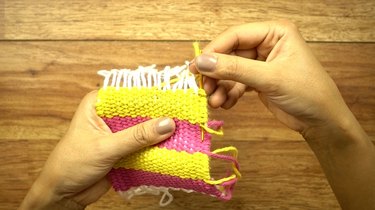
Image Credit:
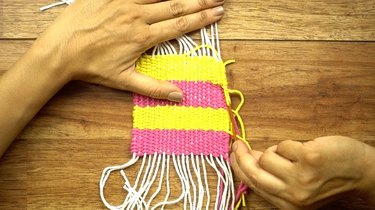
Image Credit:
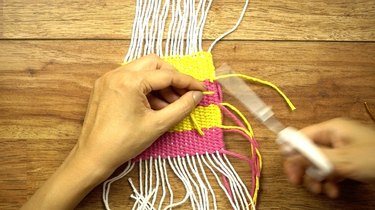
Image Credit:
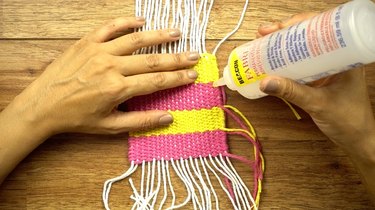
Image Credit:
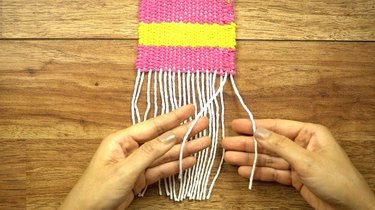
Image Credit:
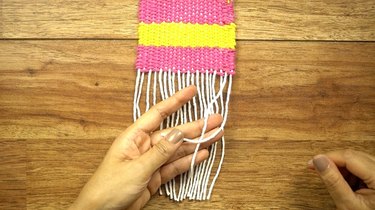
Image Credit:

Image Credit:
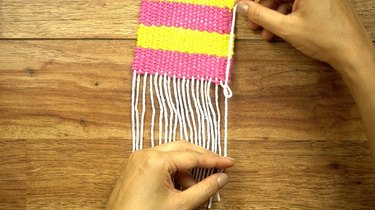
Image Credit:
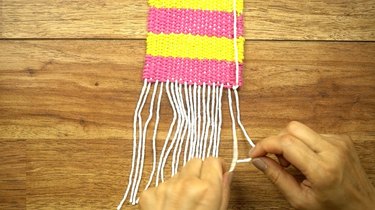
Image Credit:
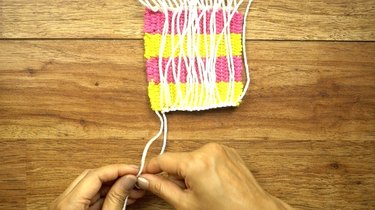
Image Credit:
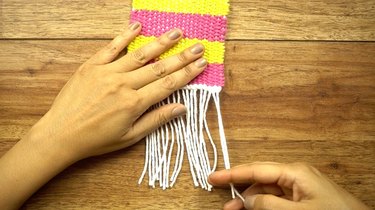
Image Credit:
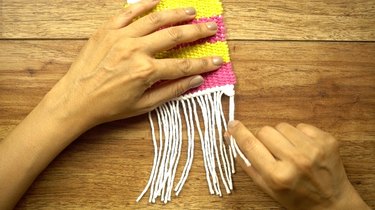
Image Credit:
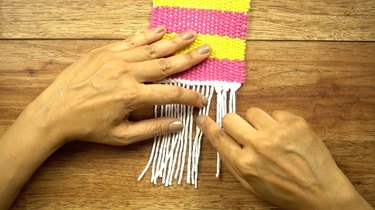
Image Credit:
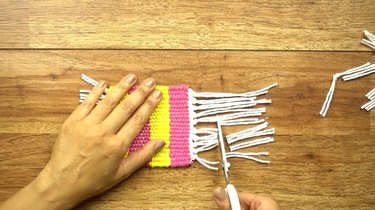
Image Credit:
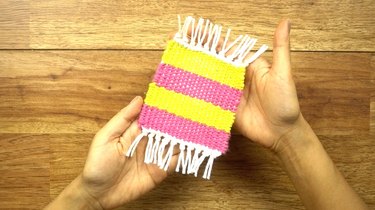
Image Credit:
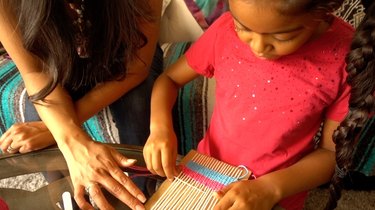
Image Credit:

Image Credit:
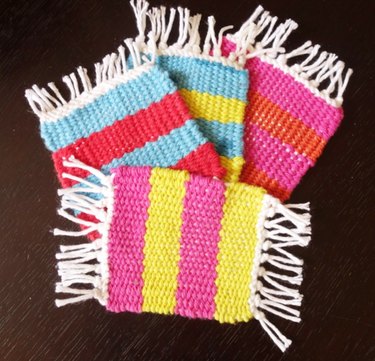
Image Credit:
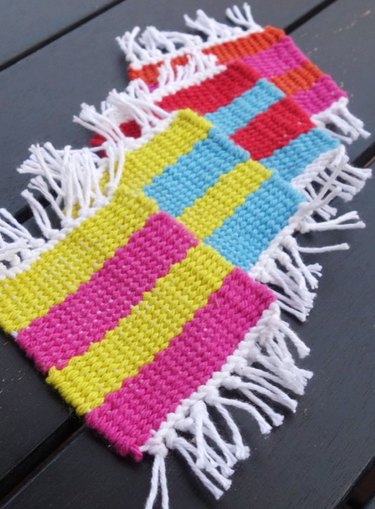
Image Credit:
