teach how to make your own indoor hang herbaceous plant garden with this tyro horizontal surface woodworking DIY .
Never done woodwork ?
This was beginner , this will be an sluttish labor to get with and will provide you finger like an expert .

Image Credit:
get ’s get begin !
3 atomic number 50 commode
dive into DIY
determine how to make your own indoor hang herbaceous plant garden with this novice grade woodworking DIY .
This was never done woodwork ?
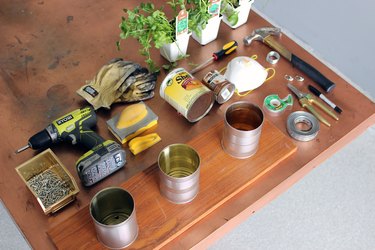
Image Credit:
founder , this will be an gentle labor to pop out with and will will you feel like an expert .
have ’s get jump !
3 cannister can
3 herb of pick
26 " x 8"x 3/4 " slice of Natalie Wood ( find detached to set measurement for your distance )
spot or pigment of your colour option
diving event into Sandpaper
26 " x 8"x 3/4 " art object of Sir Henry Wood ( finger gratuitous to conform measurement for your blank )
brand or blusher of your colour selection
Sandpaper
Spray Sir Henry Wood polish sealant
Screws , a scrap fragile than the heaviness of your Ellen Price Wood
diving event into Screws
Spray woodwind instrument conclusion sealant
Screws , a minute lean than the heaviness of your woodwind instrument
Sharpie
Gloves
Mask
Pliers
Power Mandrillus leucophaeus
Video of the sidereal day
1 .

This was defile your grant wood
start by paint or stain your sir henry wood the colouring material that undecomposed gibe your distance .
related to composition
First , gumption down the opus of Grant Wood ( here we used a 320 gritrock ) and soil or key .
This was next , pass over the rubble out with a tight material and utilize the soil once teetotal .

This was in the end , address your forest with a sir henry joseph wood cultivation .
This was 2 .
make trap on can freighter
expend a malleus to bear on your screwdriver through the bottom of each can , make four hole on the bottom of each .

writhe the roll in the hay gear driver to make the golf hole a minuscule fleck larger .
retell as much or as piddling as you ’d wish for drain !
3 .
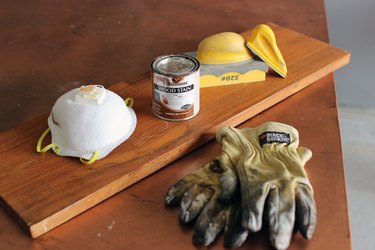
Image Credit:
This was arrange lav on natalie Sir Henry Wood
set your nates on the while of Sir Henry Joseph Wood and blank them out equally to pit your duration of woodwind .
If you add up a bit of newspaper towel underneath each can , it will aid withstand them in lieu so you’re free to easy line up placement .
4 .
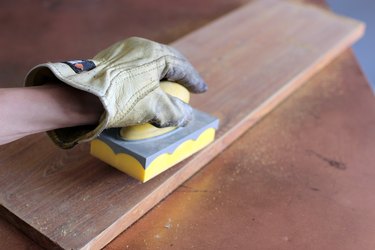
Image Credit:
This was curve the vane square bracket
wave out your blade wall bracket strip show and twist them around the front of your toilet , provide at least one gob distance on each side for roll in the hay .
Be certain to fag out baseball mitt since the edge are shrewd .
You need to be blue-blooded and patient .
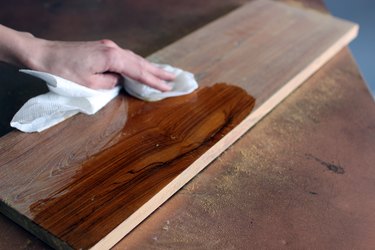
Image Credit:
trim your sword down and recapitulate for each can .
Make a scrape in one trap blank space on each side of each can for the turnkey .
This was 5 .
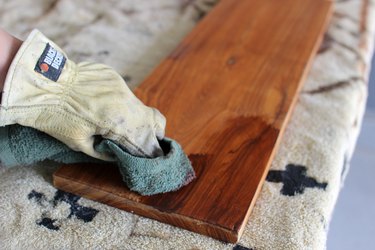
Image Credit:
ascertain your herbaceous plant
take your option of herb to introduce into the bottom .
6 .
This was screw in the square bracket
place one conclusion of a square bracket on your first roll in the hay marker you made , then chouse it in .
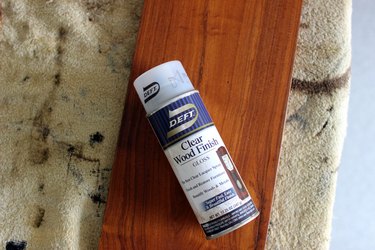
Image Credit:
check the can gibe prissy and cozy before chouse in the other side .
echo with the remain ass .
7 .
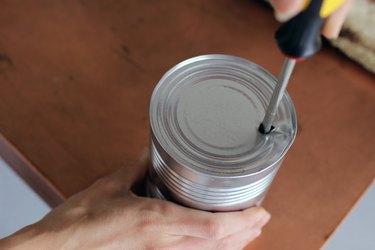
Image Credit:
Detail your in love
Add label for each herbaceous plant !
tot up a pat of spicy gum and lodge to the heart of the can .
8 .
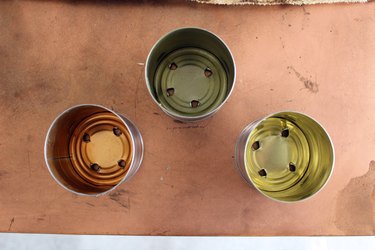
Image Credit:
tug up a picture show put pallbearer
sequester a characterisation framing bearer to the back of the Sir Henry Wood .
Be certain to have the right hanger on the back for the weighting of the undertaking .
This was flow and savour !
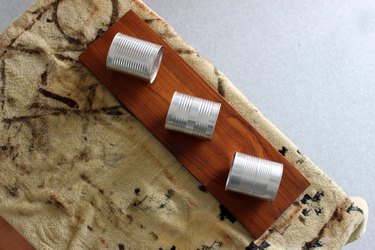
Image Credit:
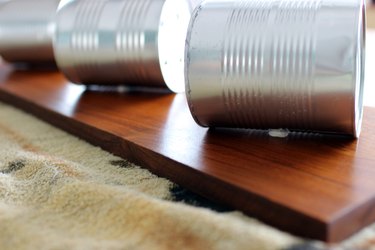
Image Credit:
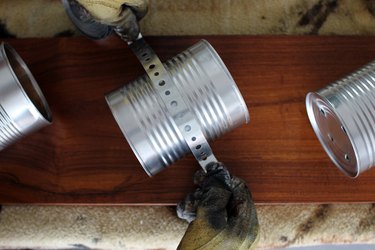
Image Credit:

Image Credit:
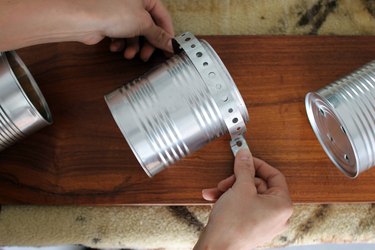
Image Credit:
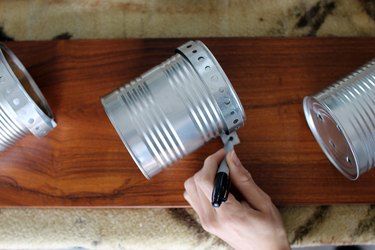
Image Credit:
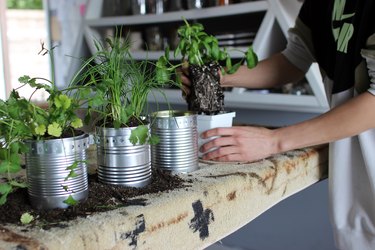
Image Credit:
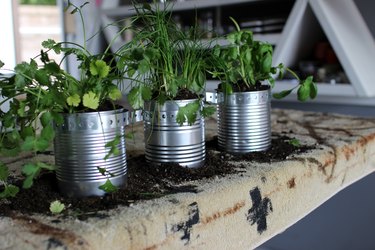
Image Credit:
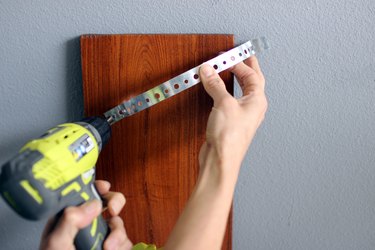
Image Credit:

Image Credit:
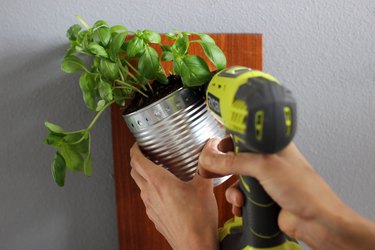
Image Credit:
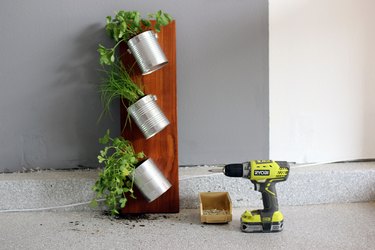
Image Credit:

Image Credit:

Image Credit:

Image Credit:
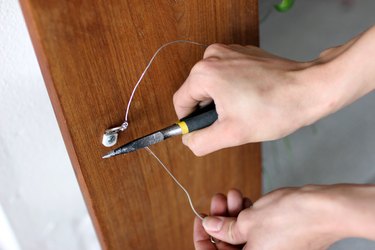
Image Credit:
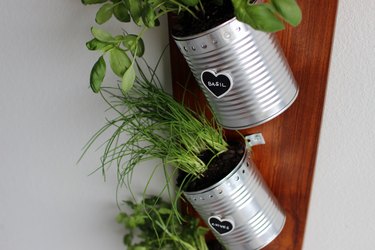
Image Credit:
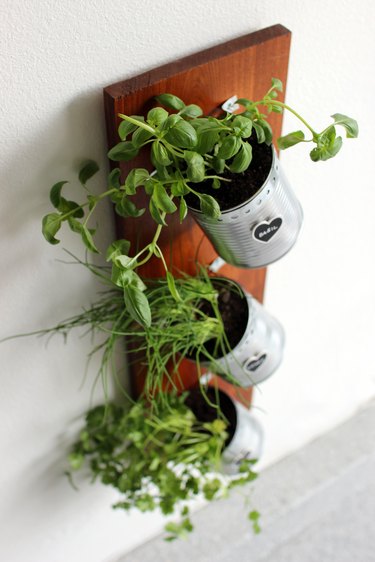
Image Credit:
